What materials do I need to start watercolour painting?
LET'S STAY CREATIVE
5 min read
Hey there! Today, we're looking into the wonderful world of watercolour painting and exploring the essential materials you'll need to get started. Whether you're a complete beginner or looking to refresh your supplies, I've got you covered with some friendly tips to kickstart your watercolor journey.
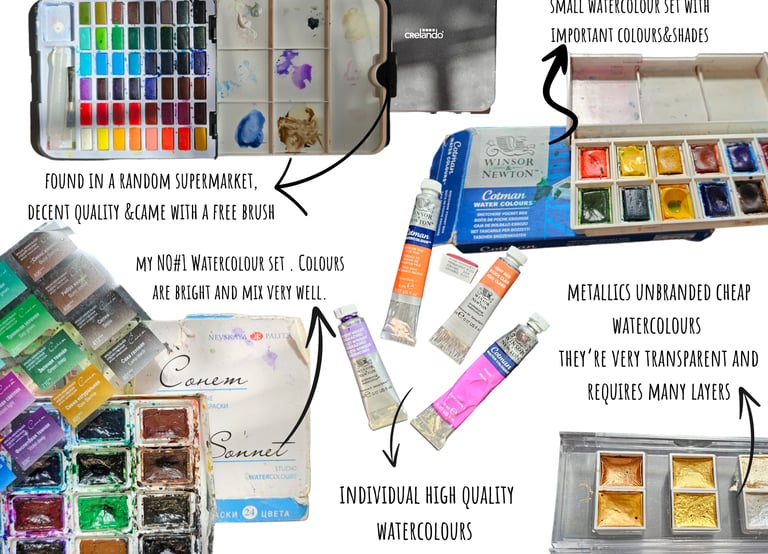
1. Watercolour Paints: Let's start with the star of the show – the paints themselves! Invest in a basic set of watercolor paints that include a variety of colors. Keep in mind that high-quality paints offer good pigmentation and lightfastness for vibrant and long-lasting results. In my experience, if a watercolor set is less expensive, the painting will require multiple layers of color, which may damage the paper.
Tip: Start with a small set of primary colors (red, blue, and yellow) along with some earth tones (like burnt sienna or raw umber). You can mix these colons to create various hues and tones. Try out different brands and colors to get used to all kinds of watercolor techniques.
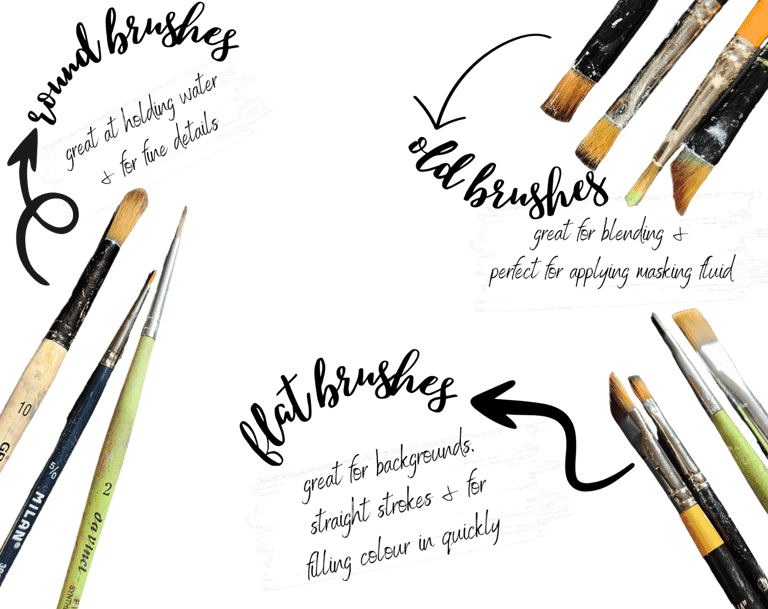
2. Watercolour Brushes: Next up, you'll need a selection of brushes suitable for watercolour painting. Opt for brushes with soft, synthetic or natural hair bristles that can hold plenty of water and paint. A variety of brush shapes and sizes will give you versatility in your painting techniques.
Back in school, I was told that round brushes are more suitable for watercolors, while flat ones are for acrylic paints. It works for me, however, sometimes I do paint with flat brushes, especially when I colour in a wide area of my painting, like the background.
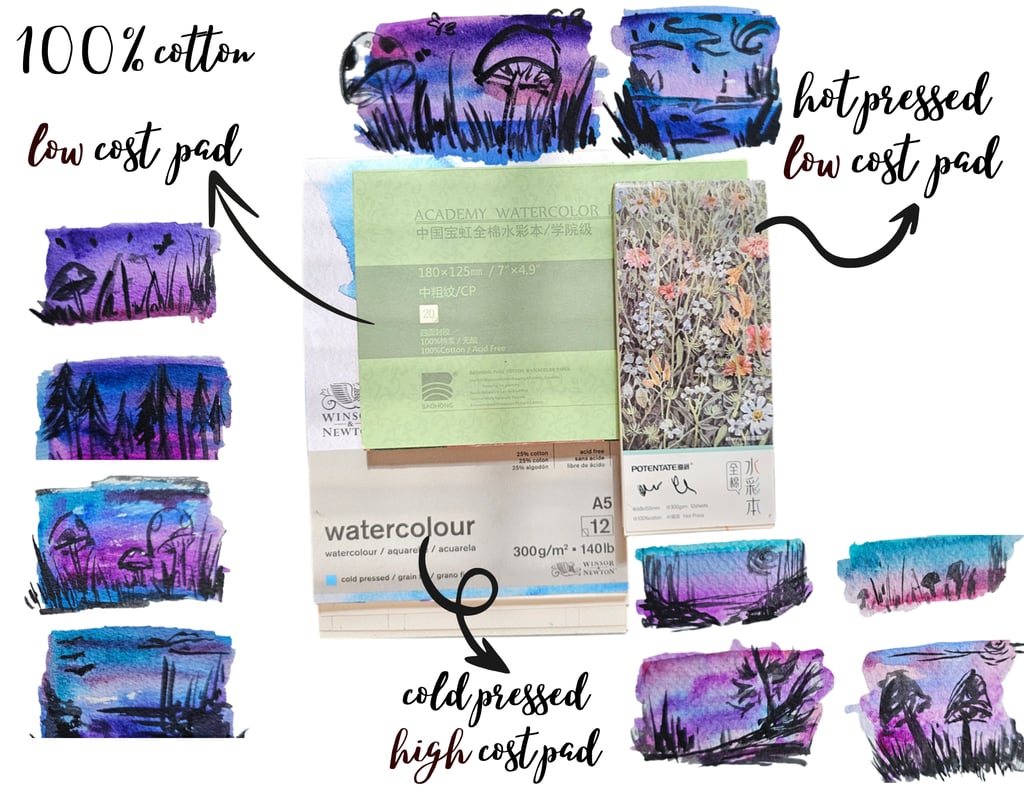
3.Watercolor Paper: Choosing the right paper is crucial for watercolor painting. Look for paper specifically designed for this medium, with a weight of at least 140lb (300gsm) to prevent warping and buckling when wet. Cold-pressed or rough paper textures are ideal for creating interesting surface textures.
While you can paint on any type of paper, the way the colored water dries will count a lot in the final look of your artwork. If your budget doesn’t allow you to dip into high-quality paper, you should look for thicker paper, rather than thin glossy one.
Tip: Experiment with different brands and textures of watercolor paper to find one that suits your style and preferences. Don't be afraid to try out different sizes and formats too – from small sketchbooks to large sheets for more ambitious projects.
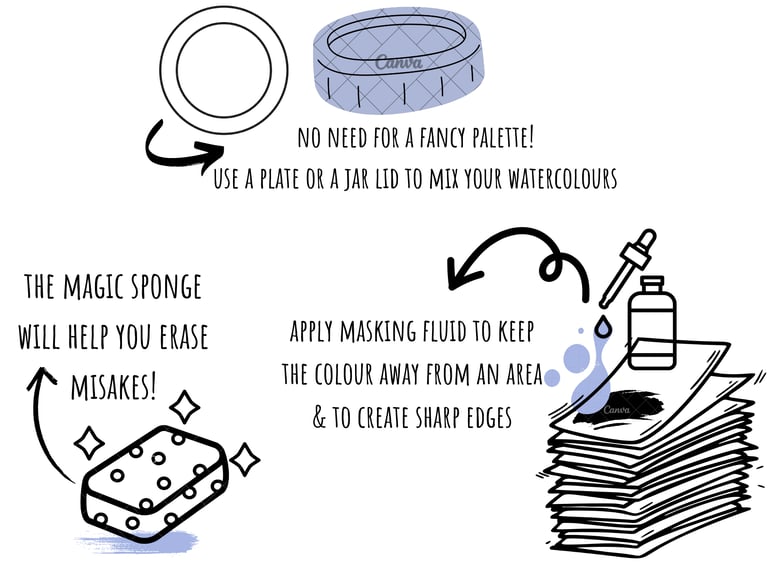
5. The Sponge & The masking fluid.
You can find a ‘watercolor eraser‘ in the form of a sponge. They are white and usually go by the name ‘magic sponge’. You can find them online or in some art supply shops. With a bit of water and a magic sponge, you will most likely be able to get most of the color off that paper.
Tip: You can use one of those yellow and green kitchen sponges until you manage to put your hands on one of those Magic sponges. The basic sponge won’t be as helpful but it will help you lift some of that watercolor paint off the paper. Let the area fully dry before painting over, to avoid damaging the paper.
Using masking fluid in watercolor painting is invaluable for preserving white areas, creating crisp edges, facilitating layering techniques, and enhancing precision and control. By applying masking fluid to areas of the paper that you want to keep unpainted, artists can achieve sharp boundaries between different elements, layer colors without worrying about bleeding, and experiment with wet-on-dry techniques more effectively. This versatile tool opens up new possibilities for creative expression, allowing artists to push the boundaries of their artwork and achieve intricate details with precision and control.
Tip: Test on Scrap Paper: Before applying masking fluid to your actual painting, test it on a scrap piece of paper to familiarize yourself with its consistency and how it interacts with your watercolors. This will help you gauge the drying time and how easily it can be removed.
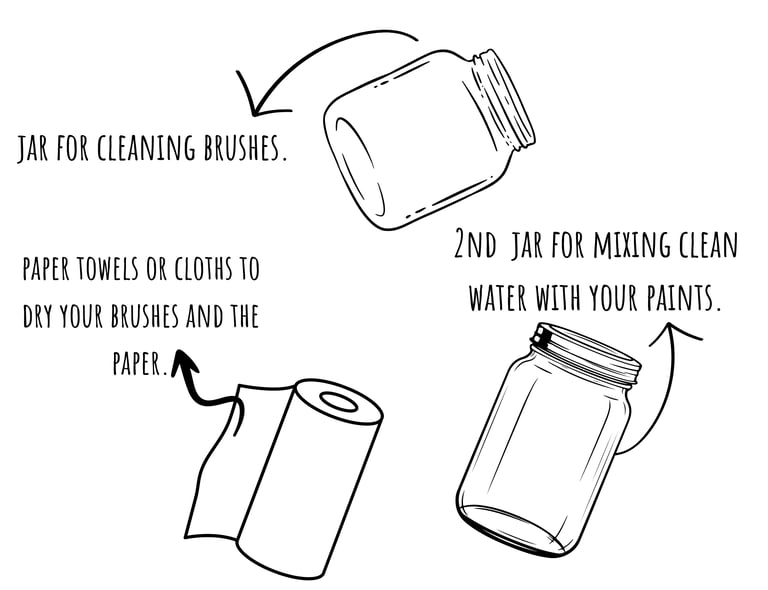
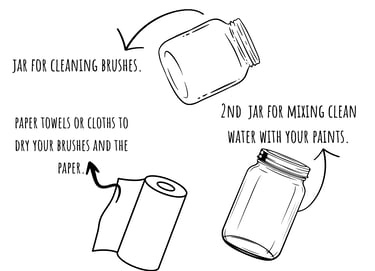
6. Water Containers and Paper Towels: Lastly, don't forget to have containers for water to clean your brushes between colors and paper towels for blotting excess water and paint. Keeping your brushes clean and dry between colors will help prevent muddying your paint mixes.
I usually use old jars to keep my water. The lid is a great water container or small pallet..
Tip: Use separate water containers for cleaning your brushes and for mixing clean water with your paints. This will help maintain the purity of your colors and prevent contamination.
Armed with these essential materials and a sprinkle of creativity, you're ready to embark on your watercolor painting adventure! Remember, the key to mastering watercolors is practice, experimentation, and above all, enjoying the process. So grab your brushes, splash some color onto your palette, and let your imagination run wild on the canvas – happy painting!