3D Clay Art on canvas
LET'S STAY CREATIVE
4 min read
EVERYTHING YOU WILL NEED FOR FOR YOUR UNDERWATER THEMED 3D CLAY ART:
Clay and one canvas ( any size)
Acrylic paints and brushes
White Gesso
Wax paper/tracing paper
Jar with water
Supplies of choice for your sketch
Mod podge (any finish)
Clay tools or household stuff to create
texture
Seashell/Sand/Acrylic Ink *optional
As an artist who loves experimenting with different crafts, I’ve accumulated a variety of supplies over time. Lately, I’ve been inspired to combine some of these materials with my painting projects, especially since art is all about pushing boundaries. When the idea of incorporating clay into an underwater-themed piece came to me, I was sure it would bring the elements of the painting to life in a way I hadn't tried before.
I always keep a pack of air-drying clay on hand—because you never know when inspiration will strike. After a couple of days of mulling over ideas, I finally settled on my plan. As soon as the weekend hit, I dove right in and started modeling the clay, ready to see how it would transform the painting.
How to Start your 3D Clay Painting
Gather Your Supplies: Start with air-drying clay. A 1kg pack should be enough depending on the size of your canvas—mine was small, so I used about half the clay.
Plan Your Design: Rather than working directly on the canvas (to avoid mess), I like to sketch my ideas first. For this underwater-themed painting, I drew the elements I wanted, then placed a sheet of wax paper over the sketch. This allows me to model the clay on top without it sticking to the paper.
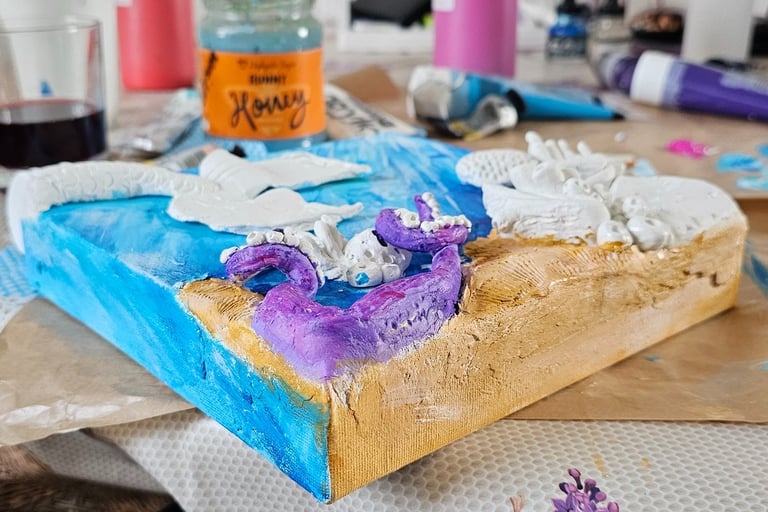
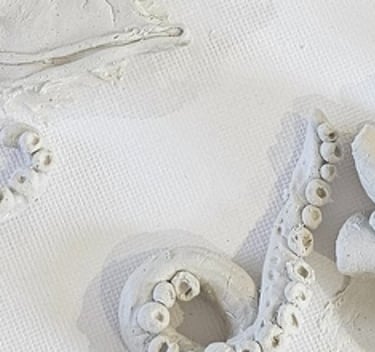
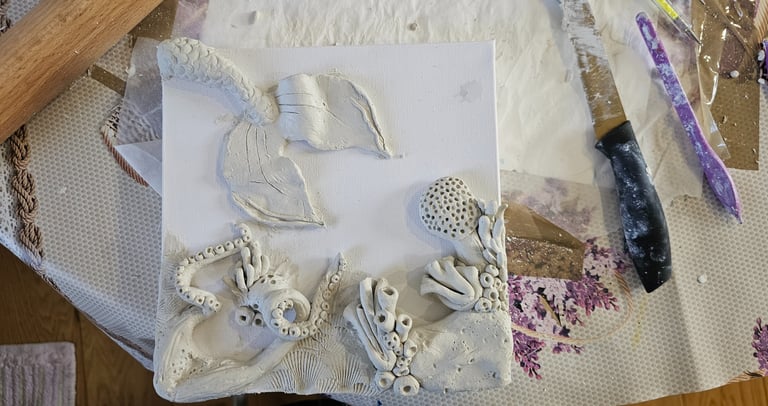
Shaping the Clay: One of my favorite underwater creatures is the octopus, so I began by creating tentacles for a corner of the canvas. If you don’t like having clay all over your hands, gloves are helpful, but I prefer using my fingers to wet and shape the clay. To ensure the clay pieces stick together, use a small toothpick or a toothbrush to gently scratch the surfaces before attaching them.
Adding More Elements: I found inspiration for underwater plants and sponges on Pinterest but soon realized that deep-sea forms can be anything I imagine. I created cute, abstract shapes to fill another corner and used clay tools to add details like holes for texture. Pressing a seashell into the clay also gave it a perfect ocean-themed texture.
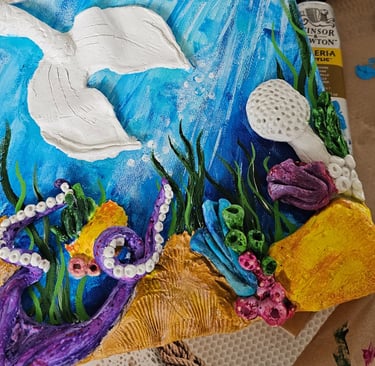
Bringing It All Together: No underwater scene is complete without a mermaid, so I added a 3D mermaid tail to the composition. It was intimidating at first, but surprisingly fun once I got into it!


Painting on Air-Drying Clay
Dry the Clay Completely: Before painting, make sure your clay is fully dry—both inside and out—to avoid cracks. I let mine dry for 24 hours, then applied Mod Podge where I thought the clay might detach. After another 24 hours, I primed the entire surface with white acrylic gesso. This gave it a more uniform texture , making the painting process slightly easier .
Choosing Colors: I use acrylic paints for air-drying clay, from cheap unbranded colors to high-quality ones. You may need multiple layers with lower-quality paints for even coverage. Once I had my colors ready, I started with the background and let my intuition guide the process.
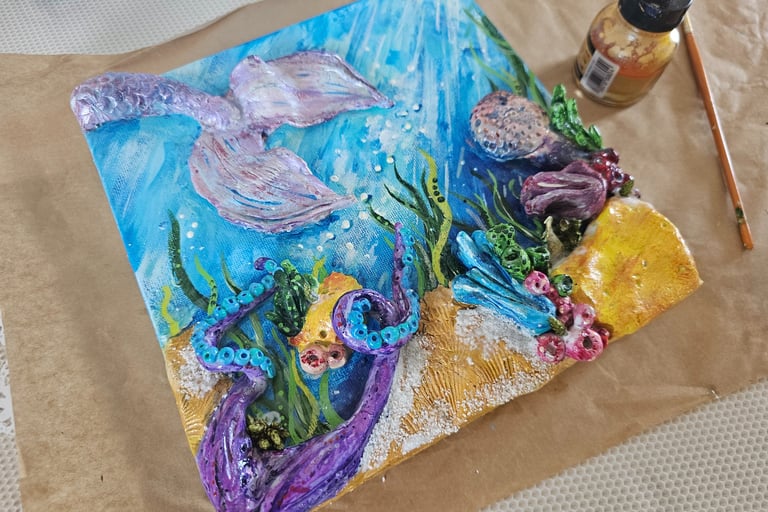
Painting the Scene: Flat brushes are great for large areas, while round ones work well for fine details. I swirled pink and purple onto the octopus and balanced it with earthy tones for the sand. I used a light brown mix of yellow ochre and white for the base and added darker shades once the layer dried. I also color-matched the edges of the canvas for a more seamless 3D effect.
Adding Final Details: As I continued painting, I added texture and depth, like green algae in the background and real sand at the bottom of the canvas. I also used gold acrylic ink to accentuate certain features, like the mermaid’s tail.
Seal the Artwork: Once the painting is finished, seal it with glossy/matte Mod Podge. You can also use acrylic varnish, but Mod Podge adds extra hold for the clay. If using spray varnish, apply at least 2-3 layers for a durable finish ( let the vanish layers dry between each other).
After sealing your 3D clay painting, let it dry thoroughly before displaying or hanging it. The added layers of Mod Podge or varnish will protect the clay and paint, ensuring your artwork lasts. If you used any mixed materials, like real sand or seashells, double-check that everything is secure and smooth out any rough edges with a soft brush or cloth.
Remember, there’s no right or wrong way to create art—every piece is unique, just like the process. Whether you're adding an extra pop of texture with clay or experimenting with new techniques, allow yourself the freedom to explore and enjoy the journey.
If you have any questions about starting your own 3D clay painting or want to share your creations, feel free to reach out! Don’t forget to subscribe to my email list for more art tutorials, tips, and inspiration delivered right to your inbox.

